
Hey everyone,
I’m really excited to share my nail art ideas on how to put OPI Sheer Tints to good nail art use 🙂
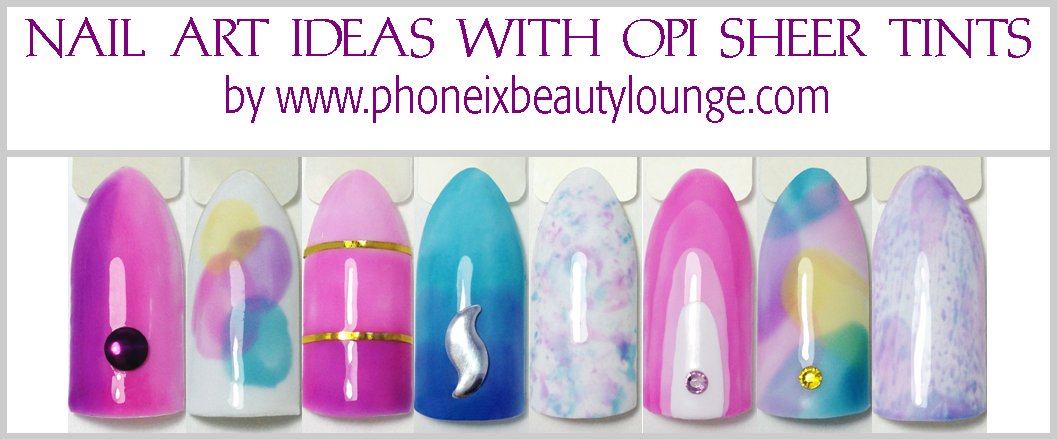
Nail Art Ideas with OPI Sheer Tints
Some of you may look puzzled at these sheer nail polishes with just a hint of color and wonder what they are good for? Let’s take a closer look and maybe they won’t seem so intimidating anymore 🙂
When i first saw these beauties, seriously, my “mental Pinterest” blew up! I’m not the creator of these techniques, but i really wanted to take OPI Sheer Tints for a test drive and see how they perform in some nail art methods that used to be difficult or too messy to do in a rush – and see if they made it any better. And they certainly did.
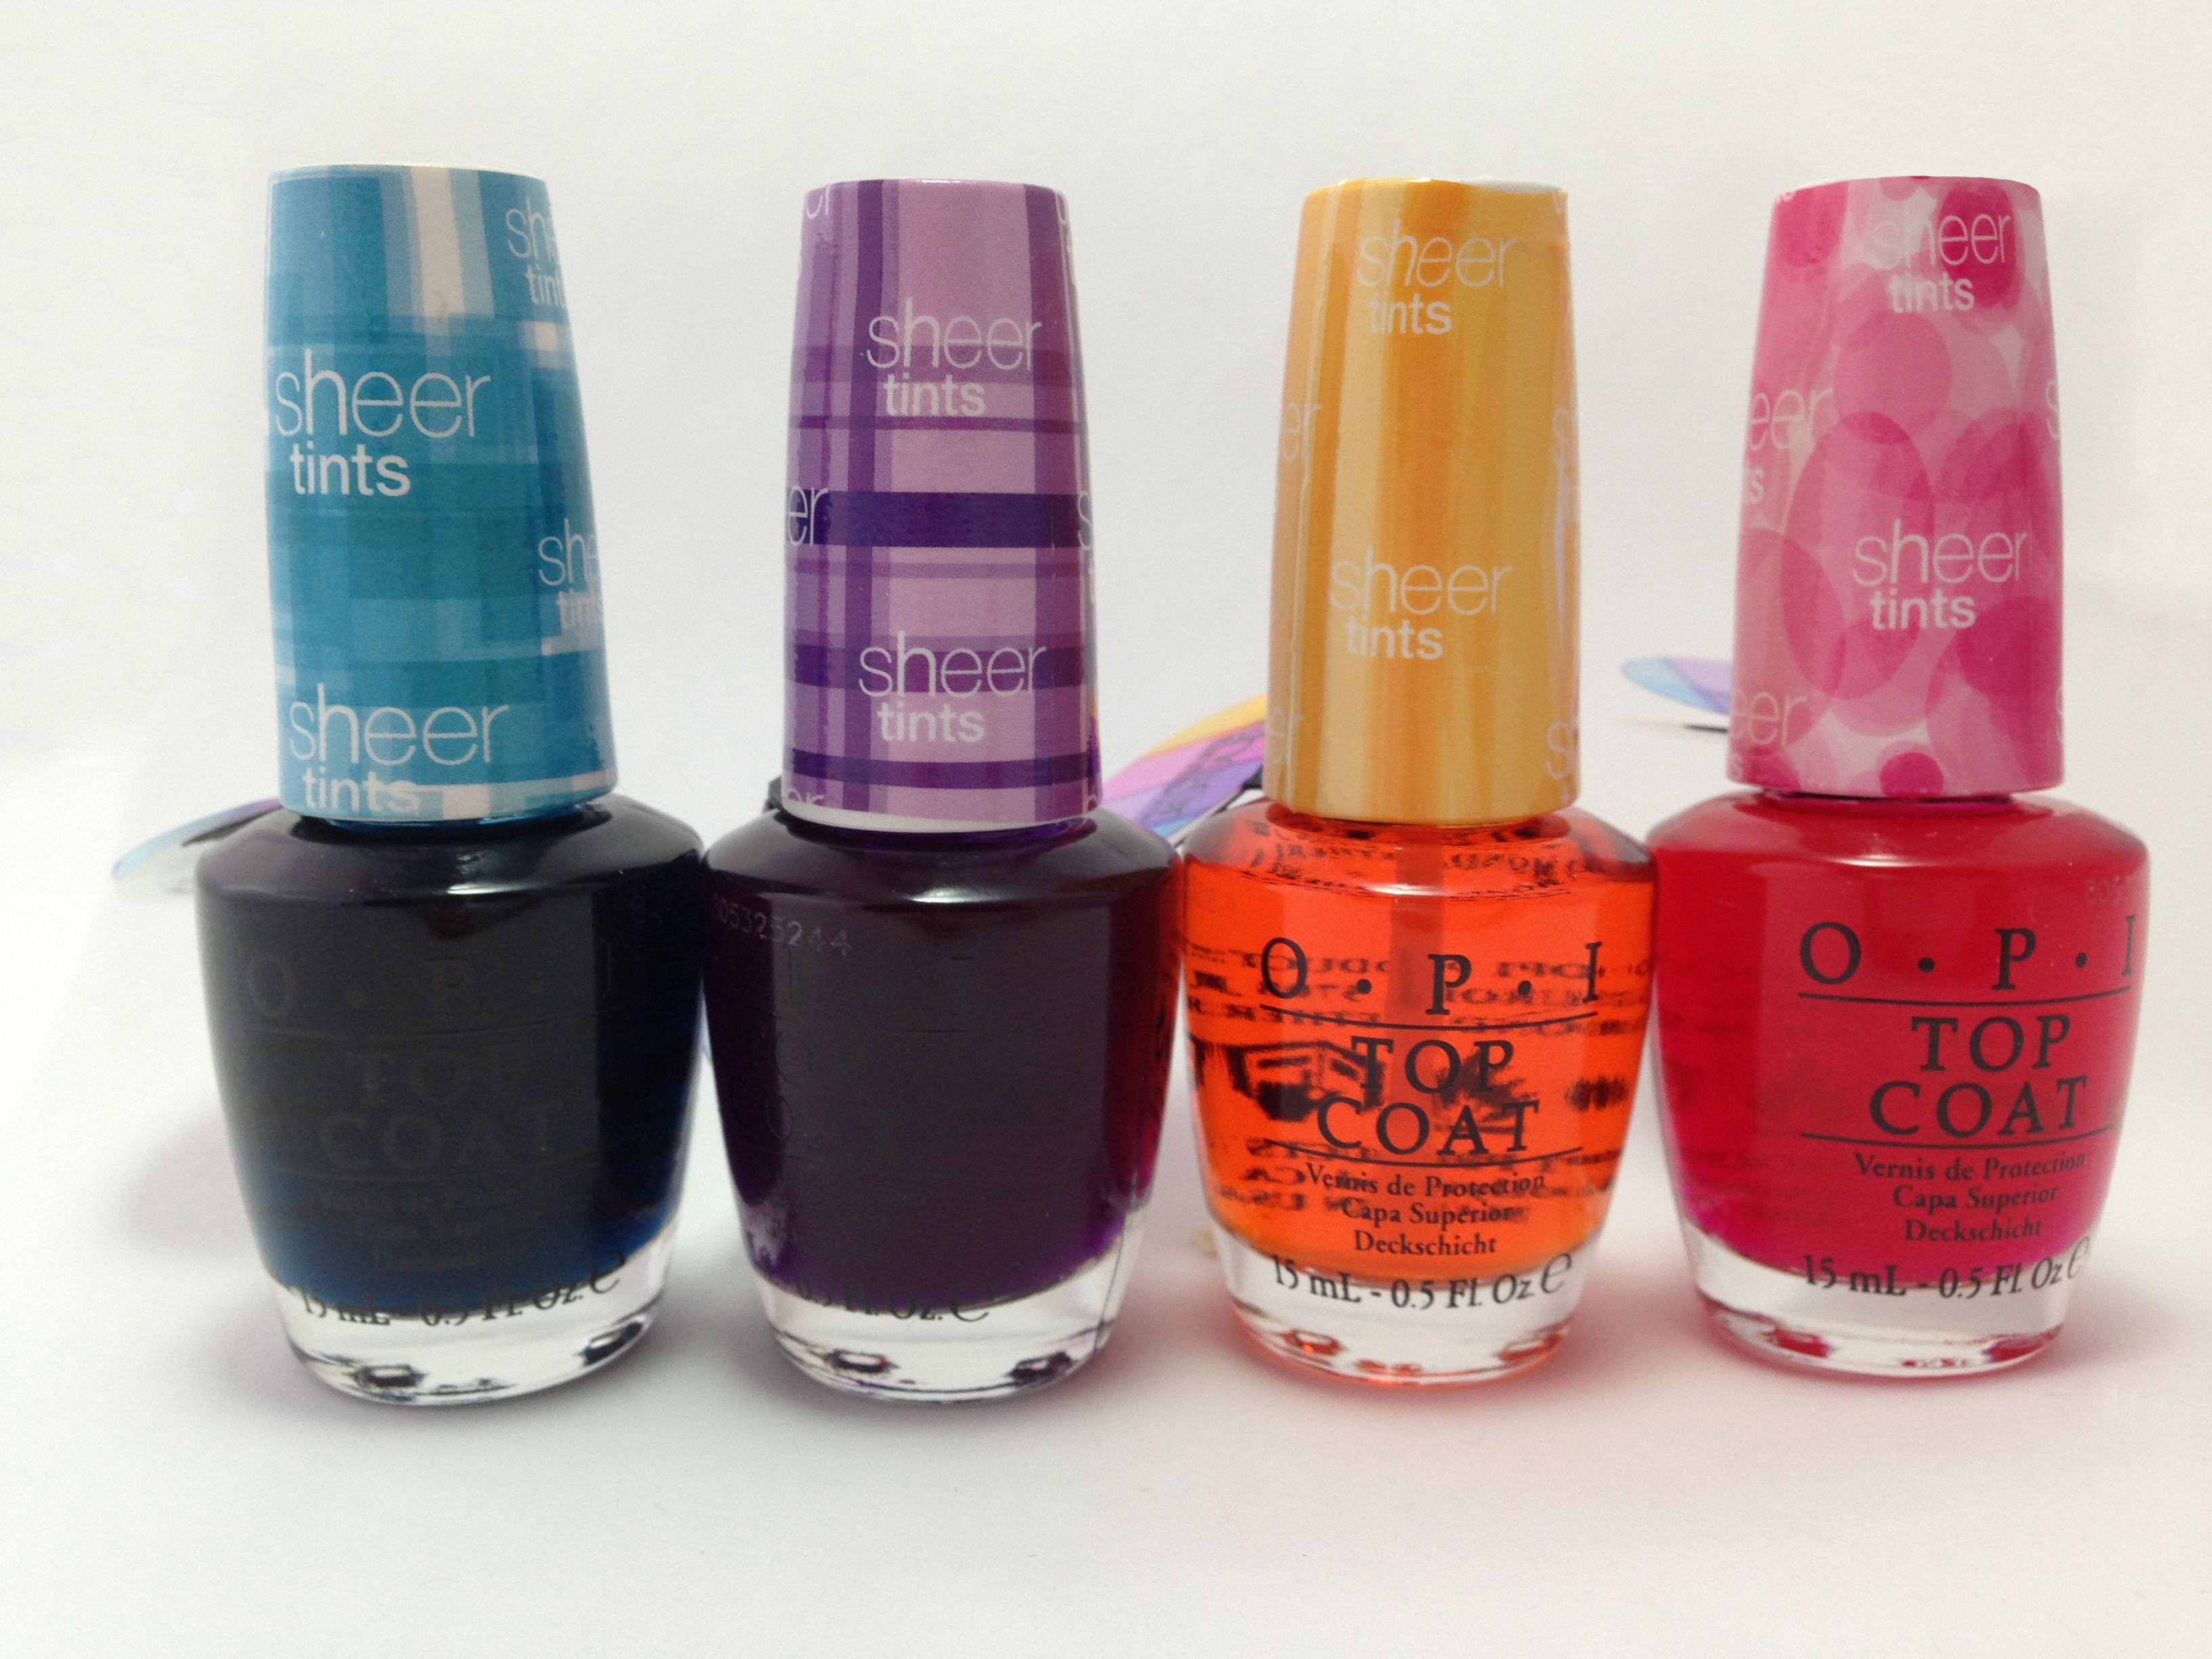
OPI Sheer Tints Full Collection
OPI Sheer tints come in 4 shades:
- OPI NTS04 I Can Teal You Like Me – blue
- OPI NTS02 Don’t Violet Me Down – purple
- OPI NTS01 I’m Never Amberrassed – yellow
- OPI NTS03 Be Magentale With Me – pink
Like i’ve mentioned earlier in my Easy Watercolor Nail Art using OPI Sheer Tints (plus swatches and review) blog post, these OPI beauties are great for spontaneous artistic designs with a lot of layering. They look amazing on top of a white color base. I used CND Vinylux Cream Puff for a longer-lasting manicure. For the record, my Watercolor Nail Art lasted more than a week on CND Vinylux white, which i thought was pretty cool!
I wouldn’t recommend using these sheer top coats on top of dark colors, like for example CND Effects Nail Polish that change the appearance of your darks. OPI Sheer Tints wouldn’t show up on anything darker than mid-tones, but playing on top of white is definitely my personal preference.
8 Nail Art Ideas with OPI Sheer Tints
Demystifying the nail art techniques used to create these swatches of easy nail art looks featuring OPI Sheer Tints:

Nail Art with OPI Sheer Tints Vertical Gradient
1. Vertical gradient: Since OPI Sheer Tints blend together beautifully well and are semi-sheer, first thing i was excited to try was a gradient. Vertical gradient was my favorite, since it was clean and easy to do, the color transition was pretty smooth and it’s a different take on a more traditional horizontal gradient nail art look. I chose to accessorize it with a purple metal stud.
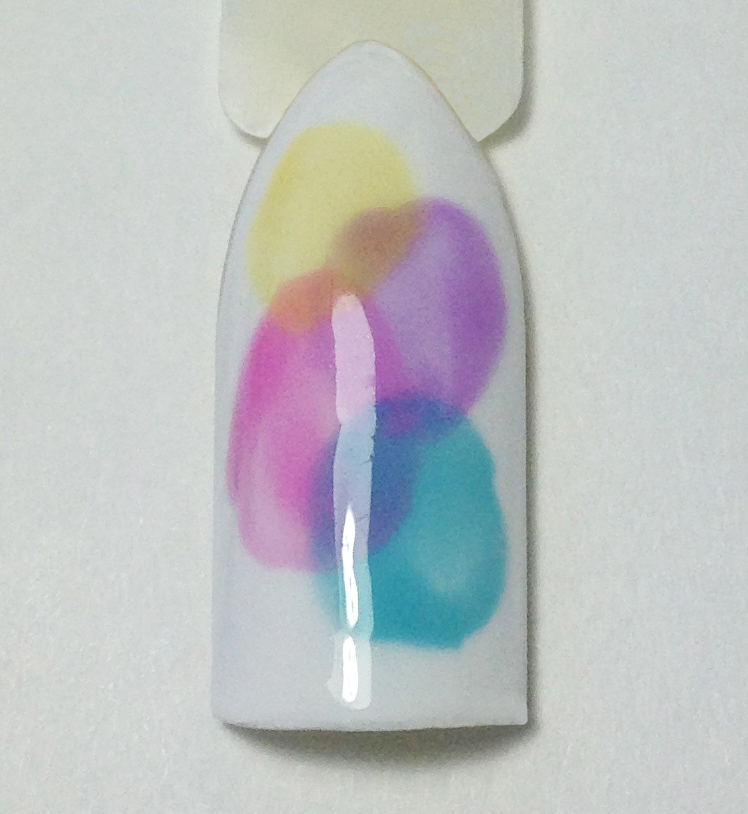
Nail Art with OPI Sheer Tints Bubbles
2. Bubbles: With the nail polish brush, draw overlapping circles on your nails and position them more towards the center of the nail.
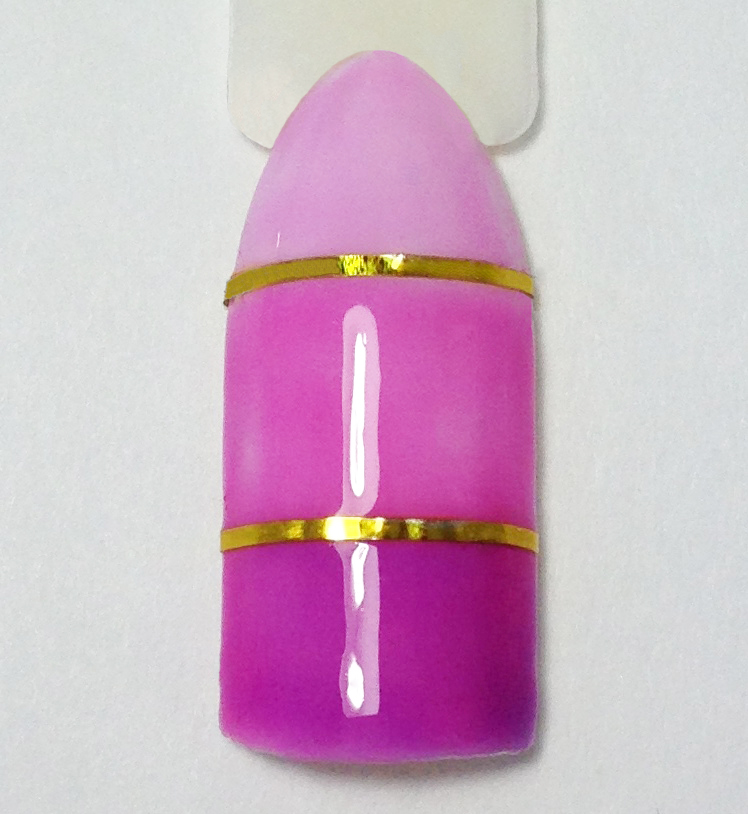
Nail Art with OPI Sheer Tints Color Blocking
3. Color Blocking: Was easily done by building pink and purple in several coats and lining the sections with gold striping tape.
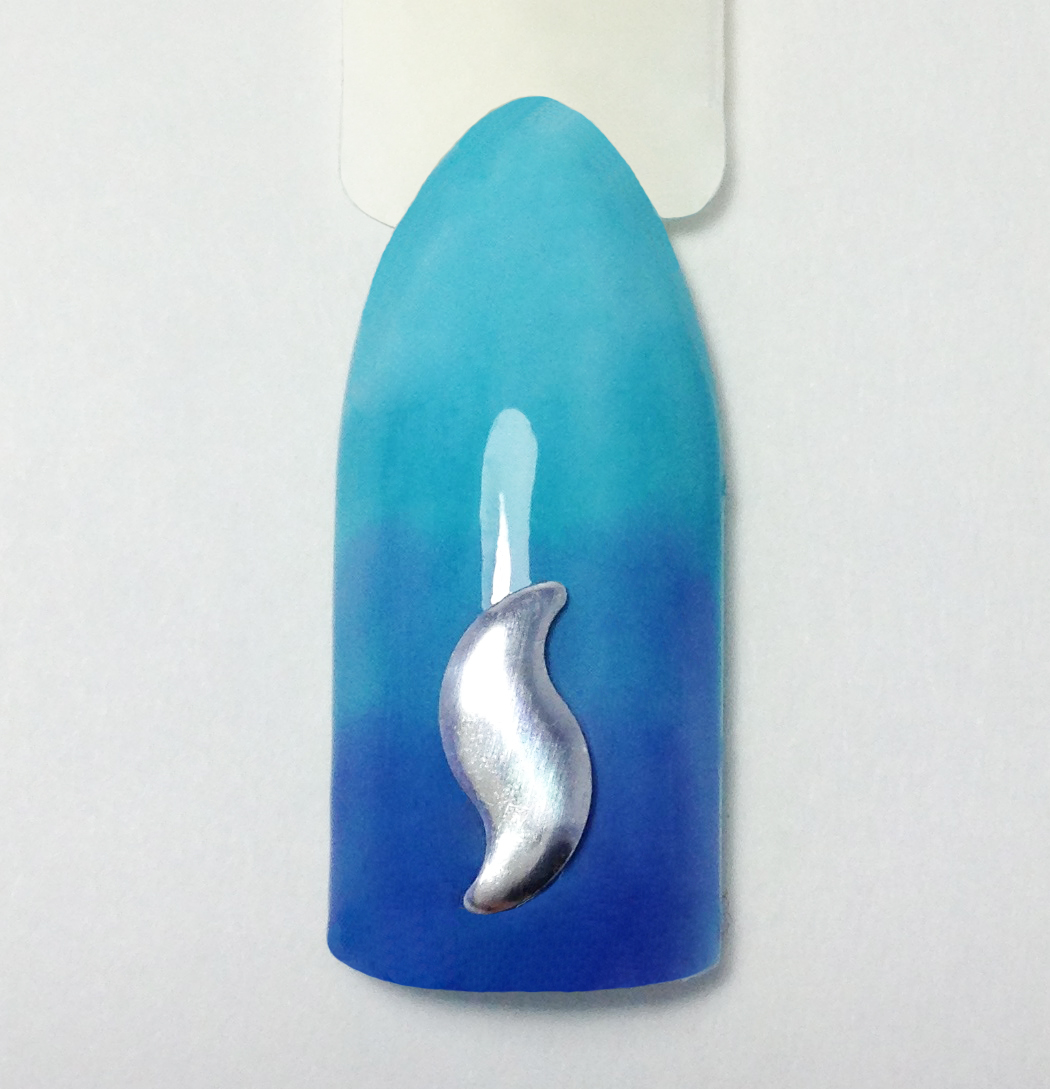
Nail Art with OPI Sheer Tints Horizontal Gradient
4. Horizontal Gradient: your usual gradient, but better 🙂 Although it won’t come out 100% smooth, lack of fancy nail art supplies or cleanup makes up for the slight patchiness in my opinion 🙂 Start with a white base, go over it with a coat of blue sheer tint. Add purple from the middle third down and add more purple on the bottom third. Add your favorite nail accessory to finish off the look.
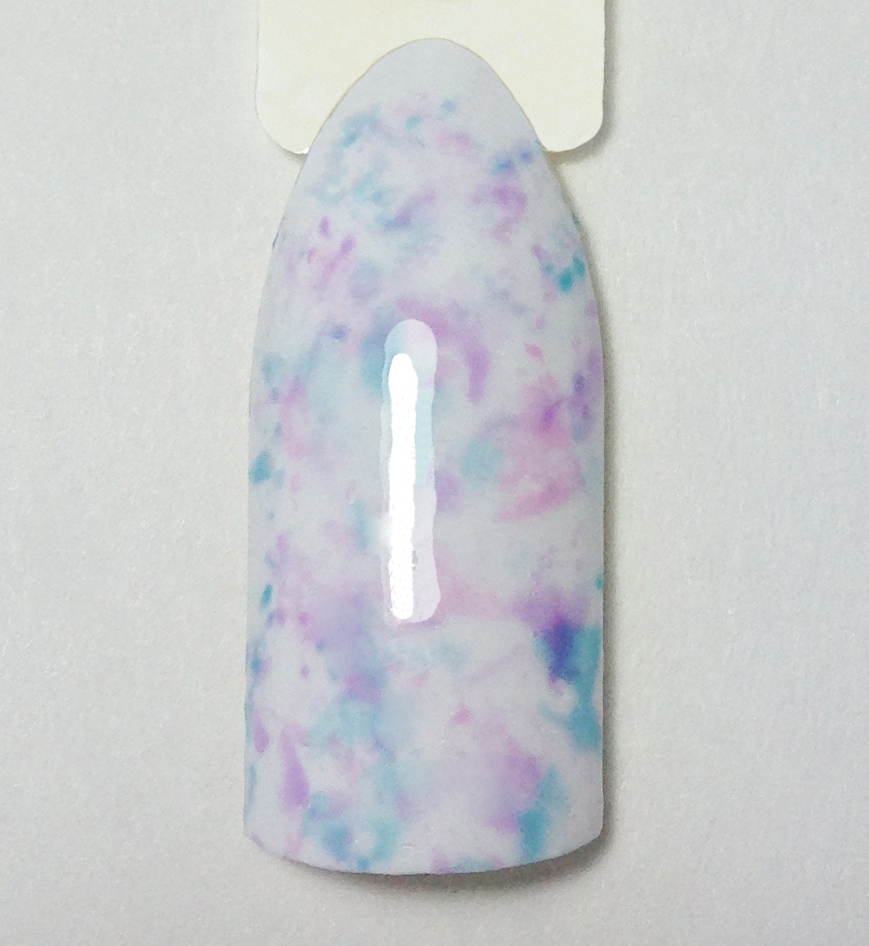
Nail Art with OPI Sheer Tints Saran Wrap
5. Saran Wrap: A quick and easy method to add little random shapes of color. Take a small piece of your regular kitchen cling wrap, wrinkle it, paint a few dots on top of the wrinkled area and apply to your nail in random spots. I like to hold my saran wrap with a nail art tweezer for a cleaner application. You can combine 2-3 colors for this look. Finish off with top coat.
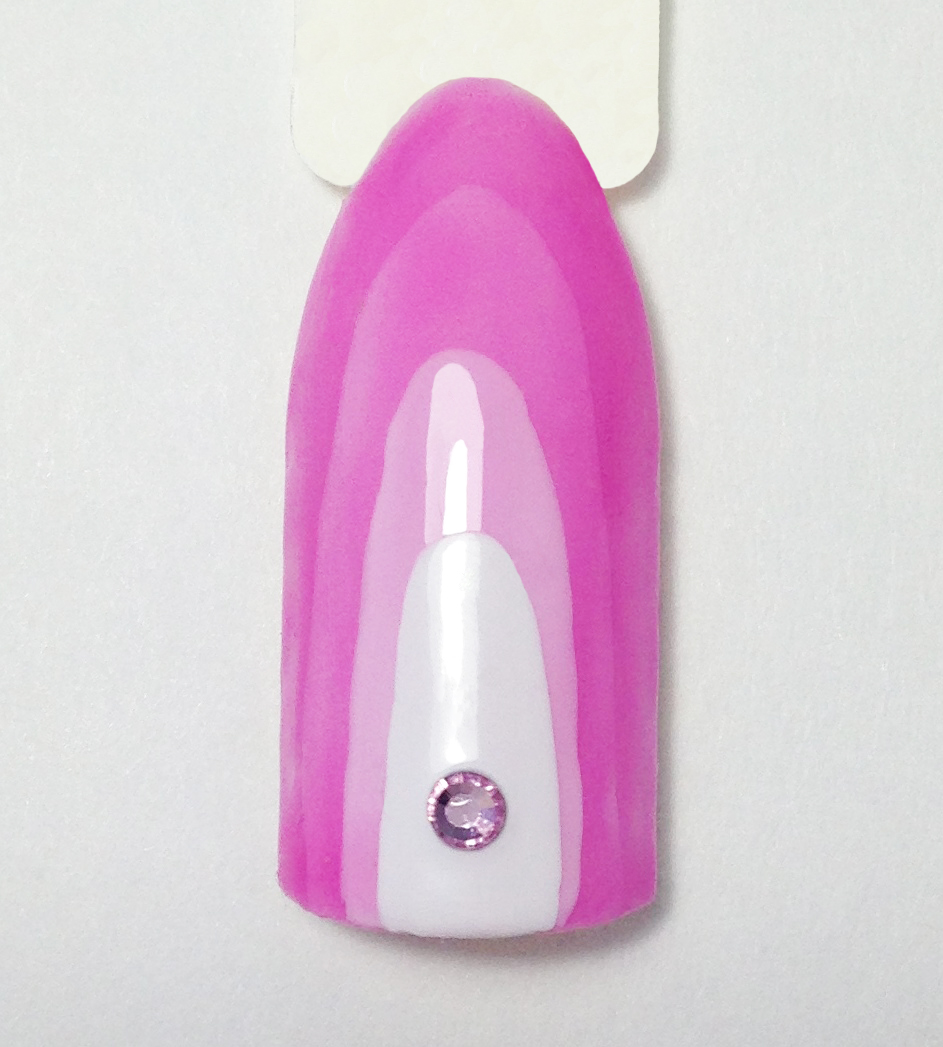
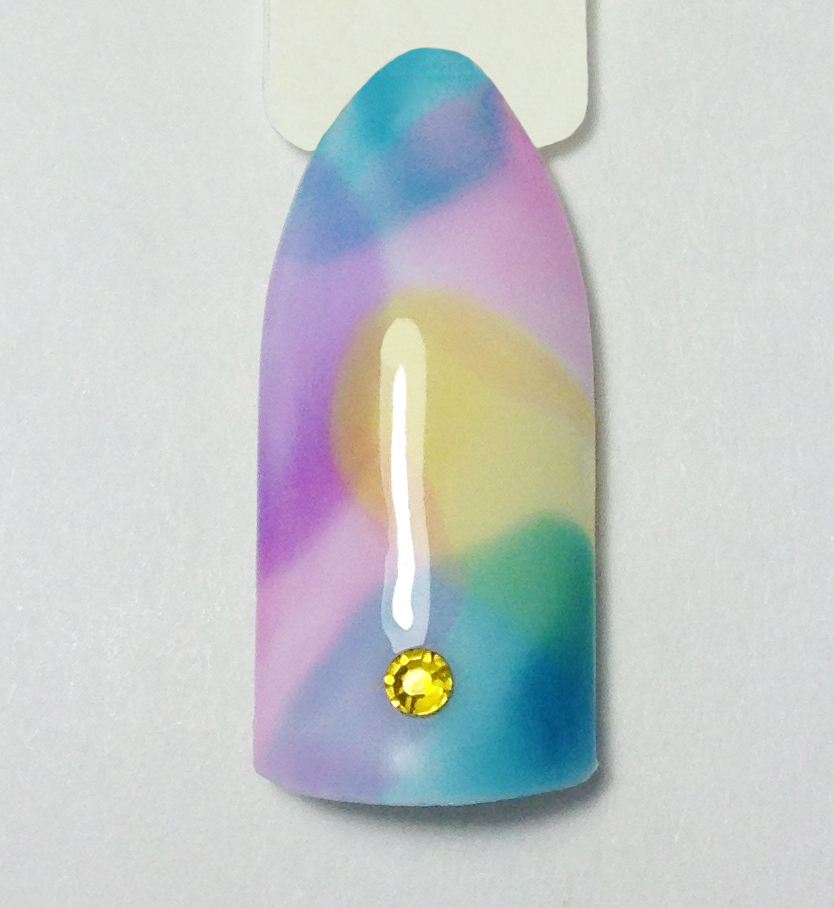
Nail Art with OPI Sheer Tints Telescopic Nails
6. Telescopic nails: My favorite look out of all and the main reason that got me excited with OPI Sheer Tints in the first place. It will take some time and skill, but the result is totally worth it. So you begin by applying one coat of OPI Sheer Tints over the entire white area of your nail. Wait for it to dry and go in painting the same shape slightly below the tip of your nail with white nail polish. Again, cover the entire nail with an OPI Sheer Tint. Go back in slightly lower and paint this shape again with white. Cover the entire nail with an OPI Sheer Tint. Add a stripe of white and a rhinestone. By covering the entire nail with a sheer tint several times, you gradually build up the color on the outer areas. Magic.
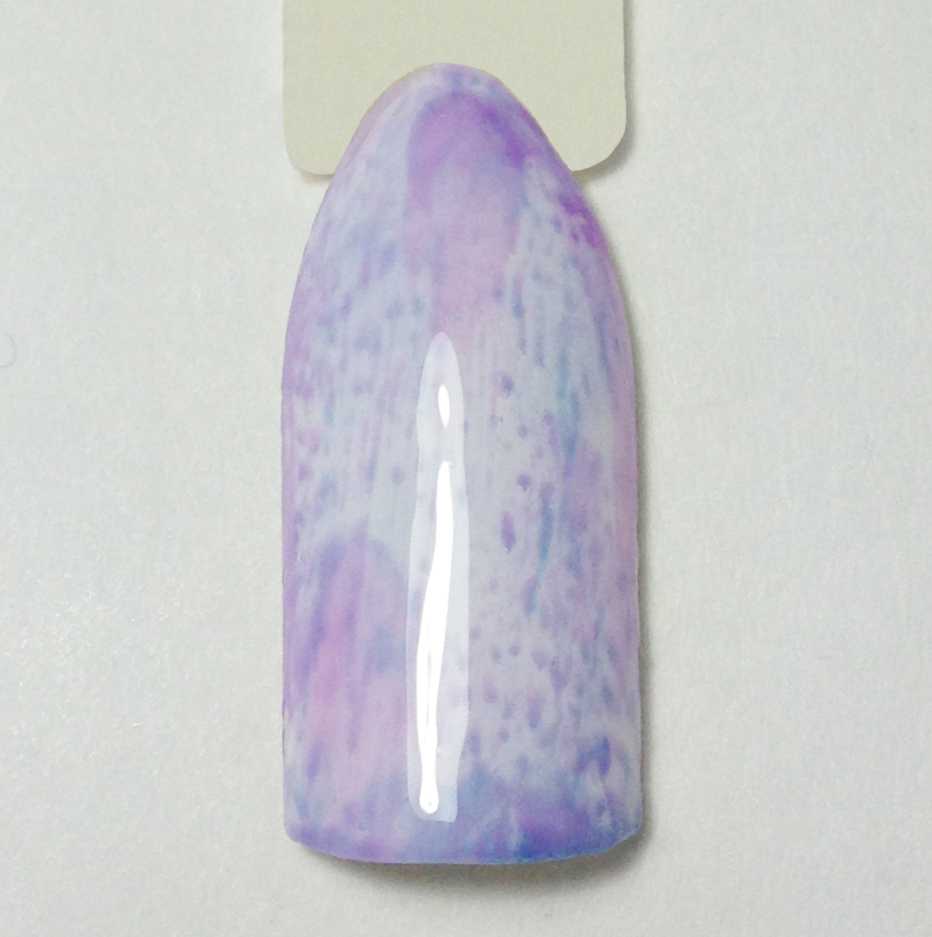
OPI Sheer Tints Watercolor
7. Watercolor Nails: please refer to my tutorial Easy Watercolor Nail Art using OPI Sheer Tints (plus swatches and review) for a step-by-step tutorial and products used.
Nail Art with OPI Sheer Tints Dry Brush
8. Dry Brush: A very easy and clean nail art technique achieved by painting random stripes on your nail with a dry nail polish brush. You have to literally wipe off all nail polish against the neck of the bottle and drag the designs with a dry brush. There’s very little product that’s left on the brush, you won’t be painting on the nail, but instead creating patchy stripes, which look pretty cool and slightly grungy when layered with other colors. You can add more opaque colors if you wish, but i personally liked the light and feathery effect that was created.
Overall, these nail art ideas will look great on both short and long nails and are fairly quick, clean and easy to achieve (except for #6).
Please let me know if you’d like a more detailed tutorial on any of these looks in the comments below.
All of the supplies used in this tutorial are available from http://www.phoenixbeautylounge.com. You can buy OPI Sheer Tints online at http://phoenixbeautylounge.com/opi-sheer-tints-top-coats/.
Hope you liked the idea and will give this design a try! If you do, please send us a comment or a photo on our Facebook page.
Thank you and take care,
Liliana

I felt the same way as soon as I saw these and really love your designs using them!
Which designs came to your mind when you first saw them? 😀
Pingback: Don't Call It A Comeback: OPI Sheer Tints Swatches, Review, Comparisons - Glitter.Gloss.Garbage
Pingback: DIY PROM | Kenton County Public Library
Lovely designs you have created. I am plannin to get these sheer tints
Great! Please post photos if you try any of these designs! 🙂
These are gorgeous!! Thank you so much as I’ll be getting a mini set of Sheer Tints soon enough, can’t wait!!