Today we’re sharing another special Phoenix Beauty Lounge how-to with you! Last time we showed you how to create Ikat Print Nails, today we’re sharing another great beginner tutorial. This time we’ll be teaching you how to create the perfect polka dot!
Polka dots are a cute and simple design, perfect for all ages. If you’ve never tried this design before, there’s a few simple tricks that can help you to achieve the perfect pattern. After all, polka dots aren’t random! They form a uniform pattern which is easy to achieve with a few tips.

Here’s a fun black and nude polka dot we created! We used a new OPI shade from the Mariah Carey collection, this is OPI A Butterfly Moment. A pretty pink frosty nude, paired up with a black polka dot.
The first thing you will need to make a polka dot is a dotting tool. This is a fun tool that is used for a lot of nail art designs, but don’t worry if you don’t own one (yet). You can easily replace a dotting tool by using a bobby pin, a toothpick or even a pencil! Once you’ve tried polka dots several times, I can promise you that you’ll find yourself wanting a dotting tool. They’re cheap and they make creating dots on your nails all the more fun! 🙂
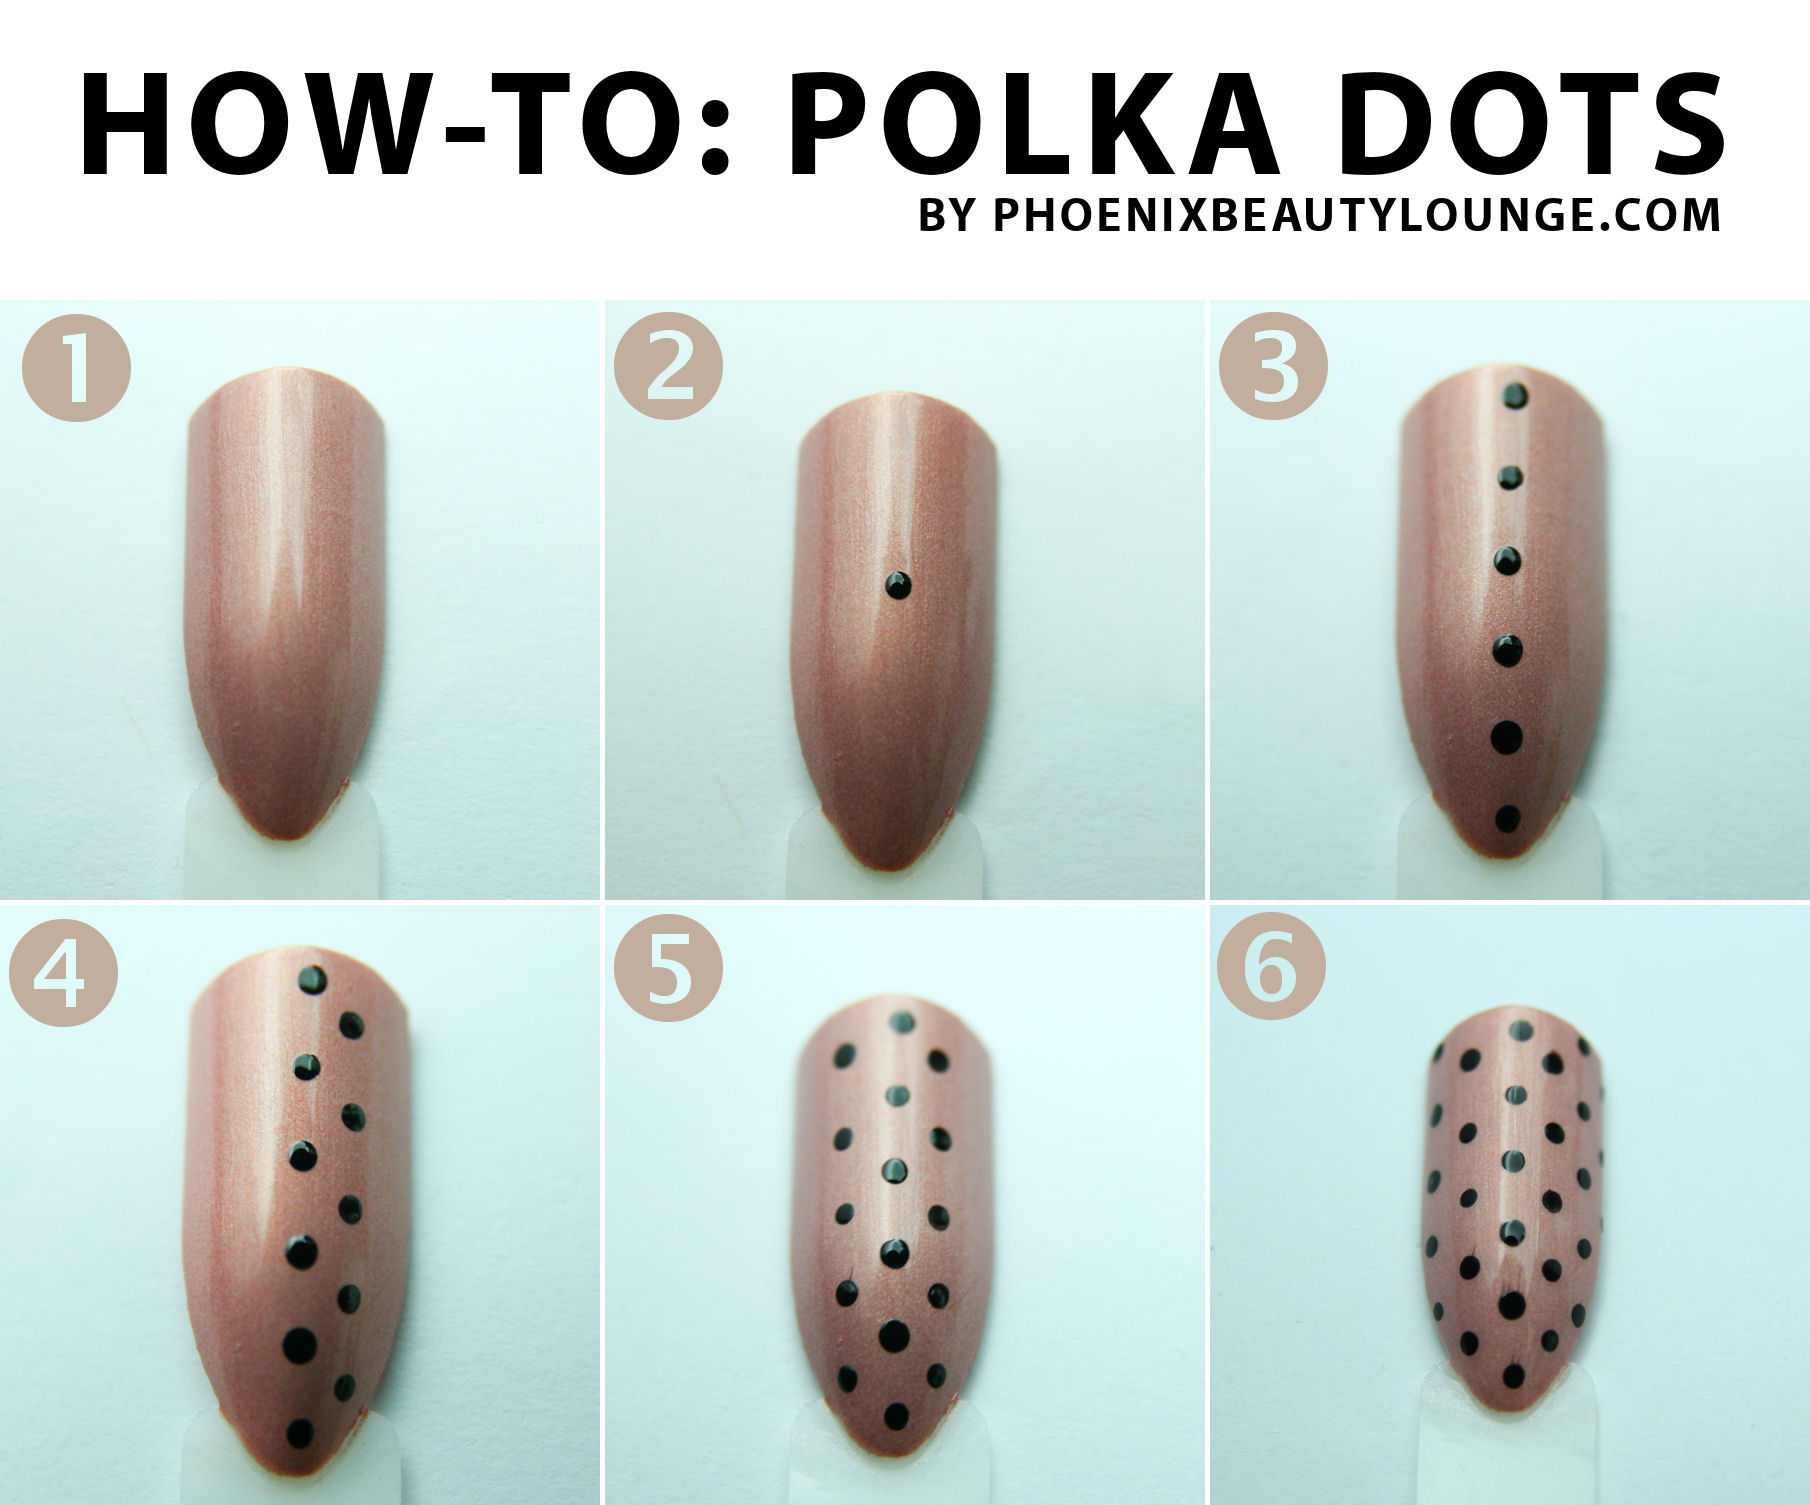
- Start by applying your base color. We’re using OPI A Butterfly Moment.
- The easiest way to start is by adding a dot in the middle of your nails. Use your dotting tool to place a black dot in the center of your nail.
- The next step is to paint several dots in a vertical row. Space them out evenly, not too close and not too far apart. Practice on a piece of paper if you are unsure at first!
- Now we need to add the second row. Place the dots a little to the right of the first row, and in the middle of the previous dots.
- Try to draw an invisible horizontal line in your head, following the dots on the third row (left) so they will be parallel to the second row we painted in step 4.
- Final step is to fill in the rest of the nails, we added two more final rows on either side.
Finish with some glossy top coat and you’re all done! Make sure to wait until all the dots are completely dry so you don’t smear your design. Quick tip: if you find that you smear your design easily with your top coat, try holding your brush parallel to the base of your nail. Use a very light touch and try not to touch your actual nail with the brush, only letting the top coat glide over your nails. You’ll notice that your design won’t smear as easily, or at all! Good luck!
We hope you enjoyed this tutorial on how to achieve the perfect polka dot nails! If you try them out make sure to send us pictures so we can admire your work. Who knows, we might even feature your nails on our blog!
Happy painting! – Phoenix Beauty Lounge.